Phase 7 Details
MRP Redditt 24 MAR 13 – 27 MAR 13
“Just because”. How many of us have used that as a reason to do something completely unexpected? Certainly driving a great distance in the winter to work on an airplane that’s buried in snow would qualify for that statement! But, seeing that there is so much work to get done, I thought that it would be best to try and get the majority of all of the smaller work done – and the preparation work done for the bigger jobs that will happen later – by myself earlier in the year. That way, the taskings can be done that much faster with the end result of a flying aircraft achieved that much sooner.
Limits on what needs to be done for this MRP? Well, the fact that I’m doing the work by myself does limit what I can – and can’t do. But – honestly – that also means that I’m really going to appreciate it that much more when other members of the crew are able to join me. So - for this MRP - what has been done is the larger taskings were dividing up into smaller ones. That way the workload is spread out and as much ground as possible is covered – while still getting the important taskings completed. (It also means that not every single tasking is crammed into one large trip.) This way, the work load is a little more manageable. Also, please note that – with one exception – all the photos taken were done by myself.

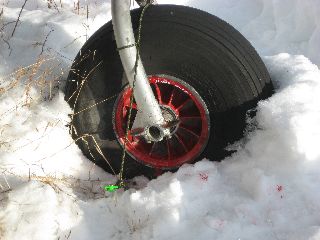
The airplane in March under three feet of snow.
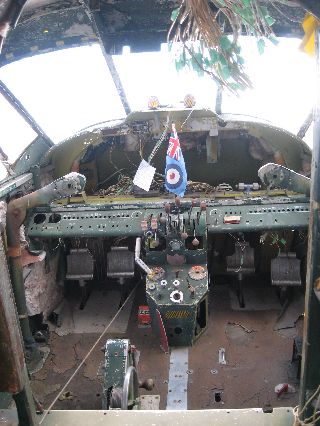
Wire Code Chasing, Electrical Component Location Map and Cockpit Clean Up
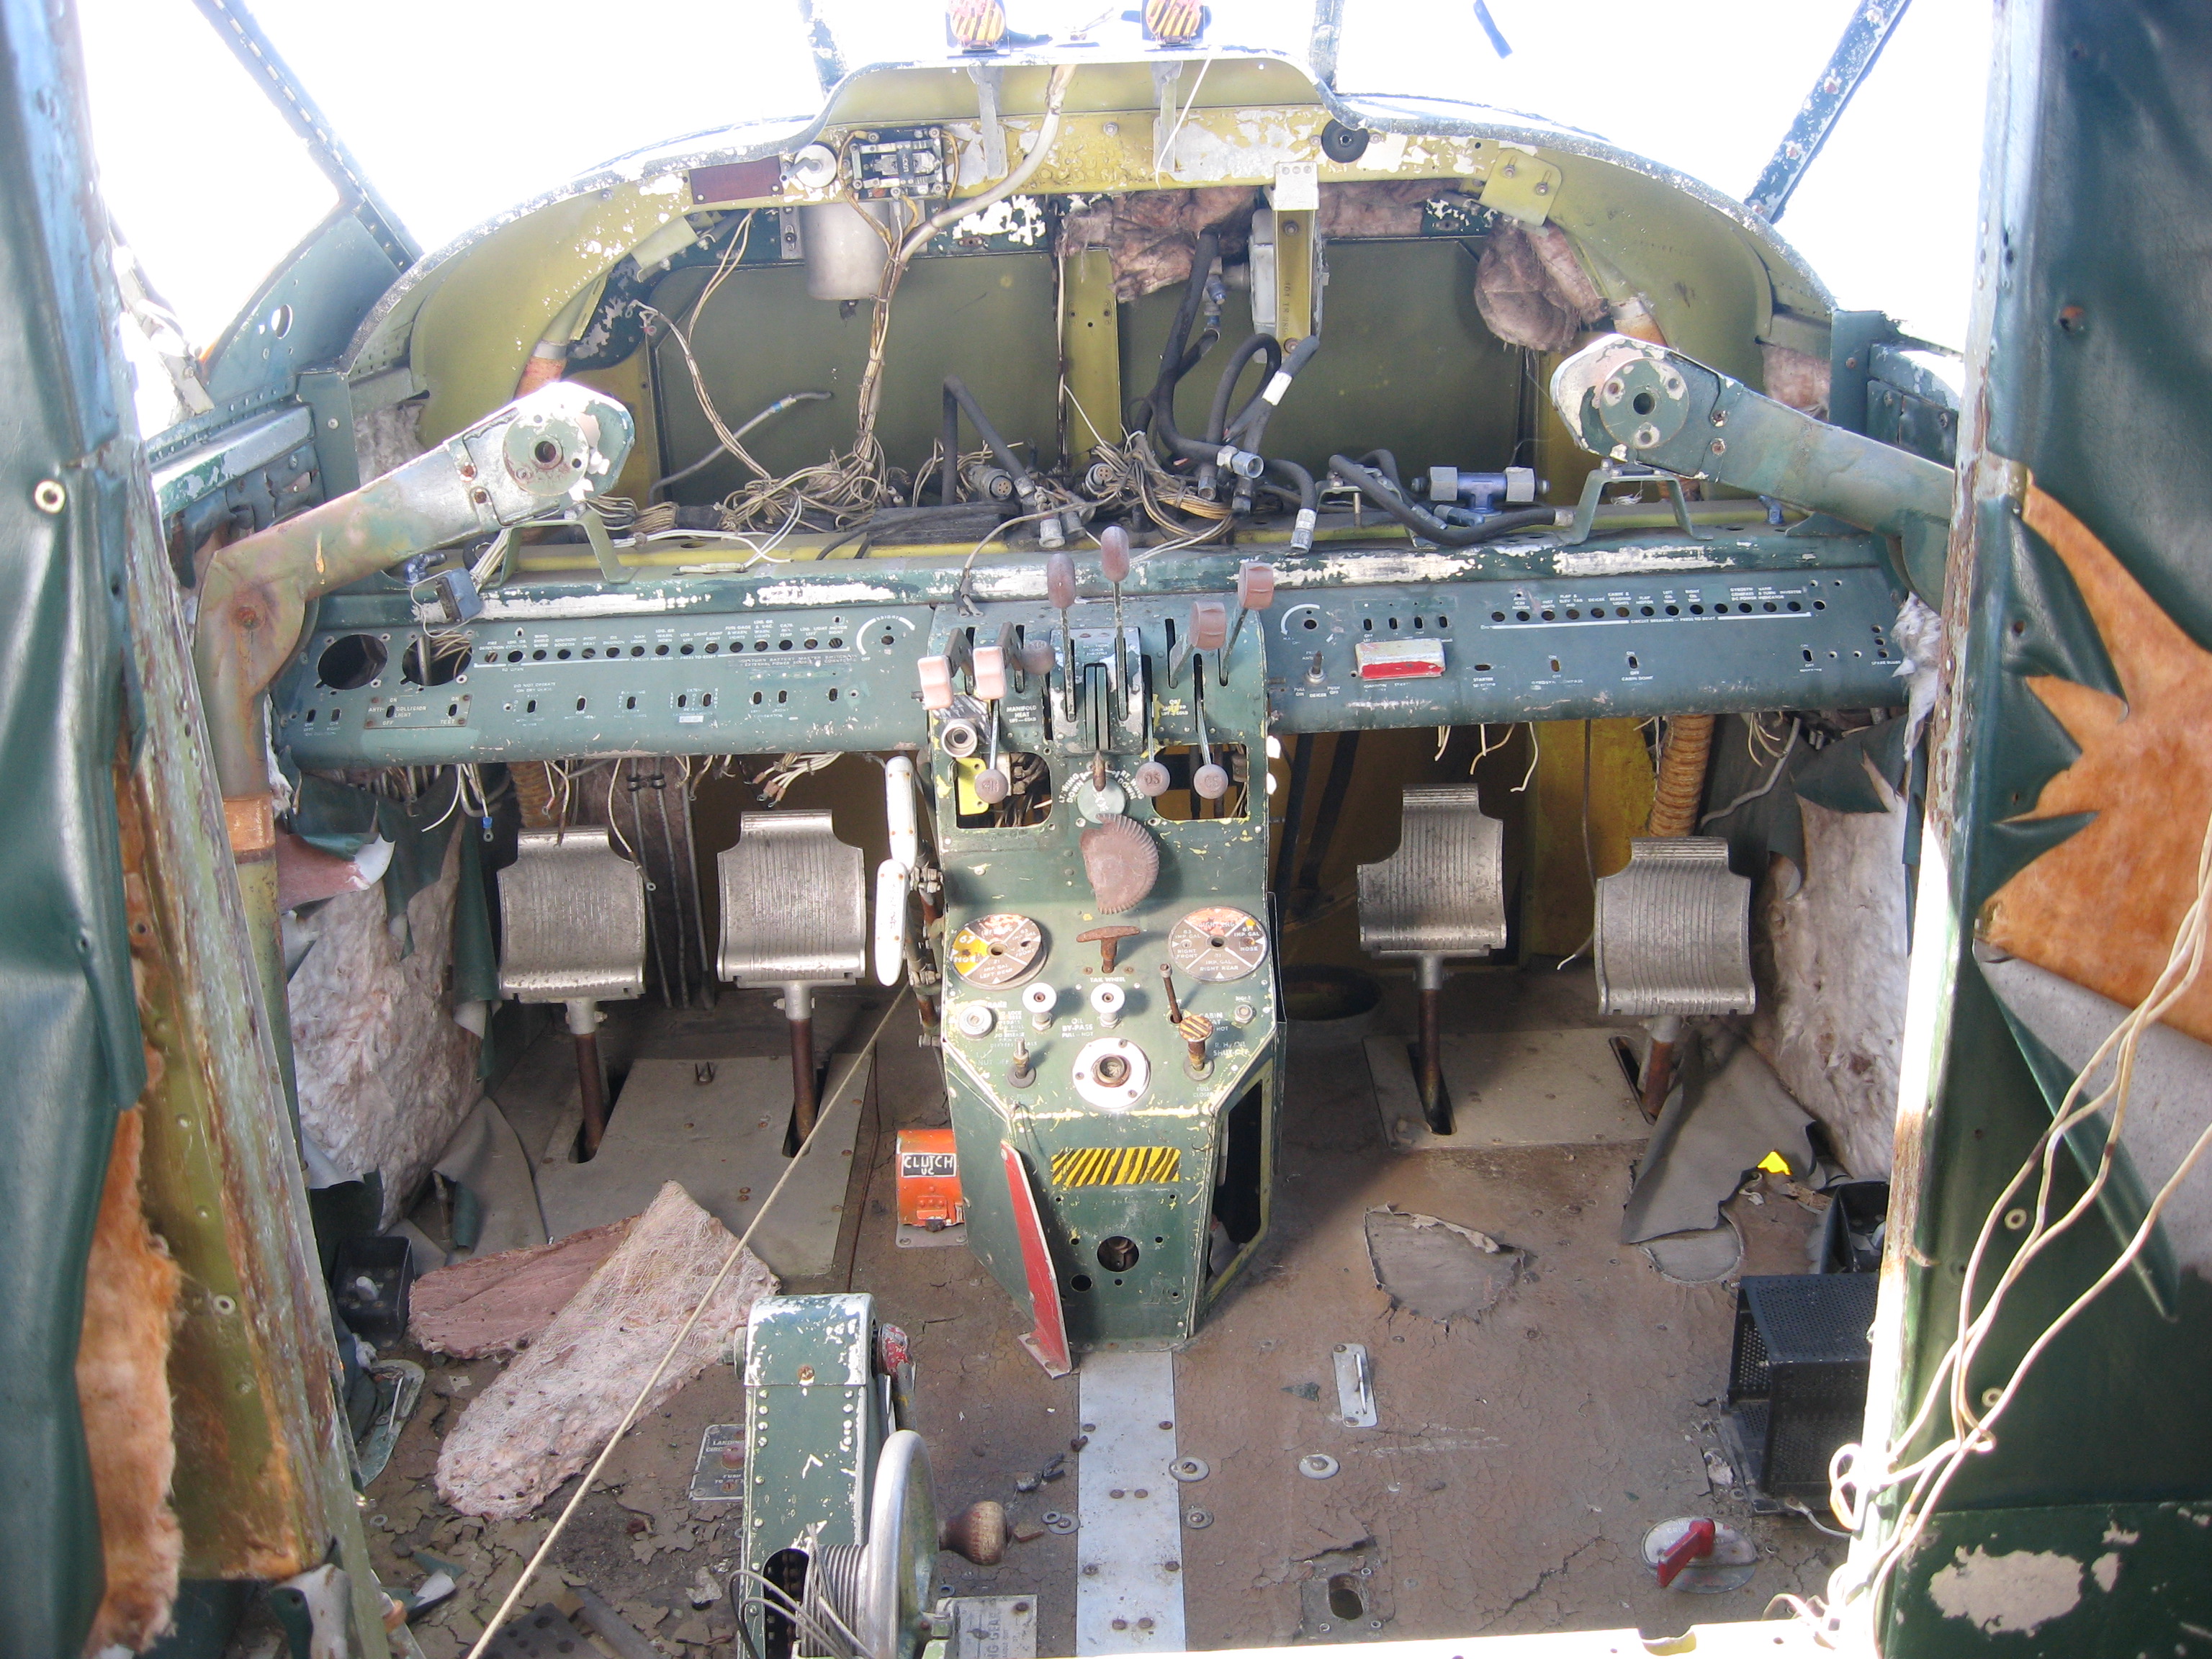
Not quite fully believing the size and scope of the electrical problem – I mean, I knew things were bad electrically, but I didn’t clearly know just how bad – this tasking was made one of the main focuses of the MRP.

Where does one start after nearly forty years of neglect?
One of the things that came across very clearly upon further examination of the electrical wiring was the fact that a great deal of substandard work had been done in the past. (As a matter of fact, I’m beginning to suspect that the main reason that the airplane stopped flying when she did was mainly an electrical one.) Shoddy crimping, very poor application of heat shielding, the splicing of old wire to new wire, wires of different composition zap strapped to one another (thus greatly increasing the chance of one wire chafing through another) were the rule of the day when the wire bundles were pulled apart.

Two feet by two feet coupled with rudder pedals in your back and components still installed on the floor doesn’t give you much – if any – room to work.
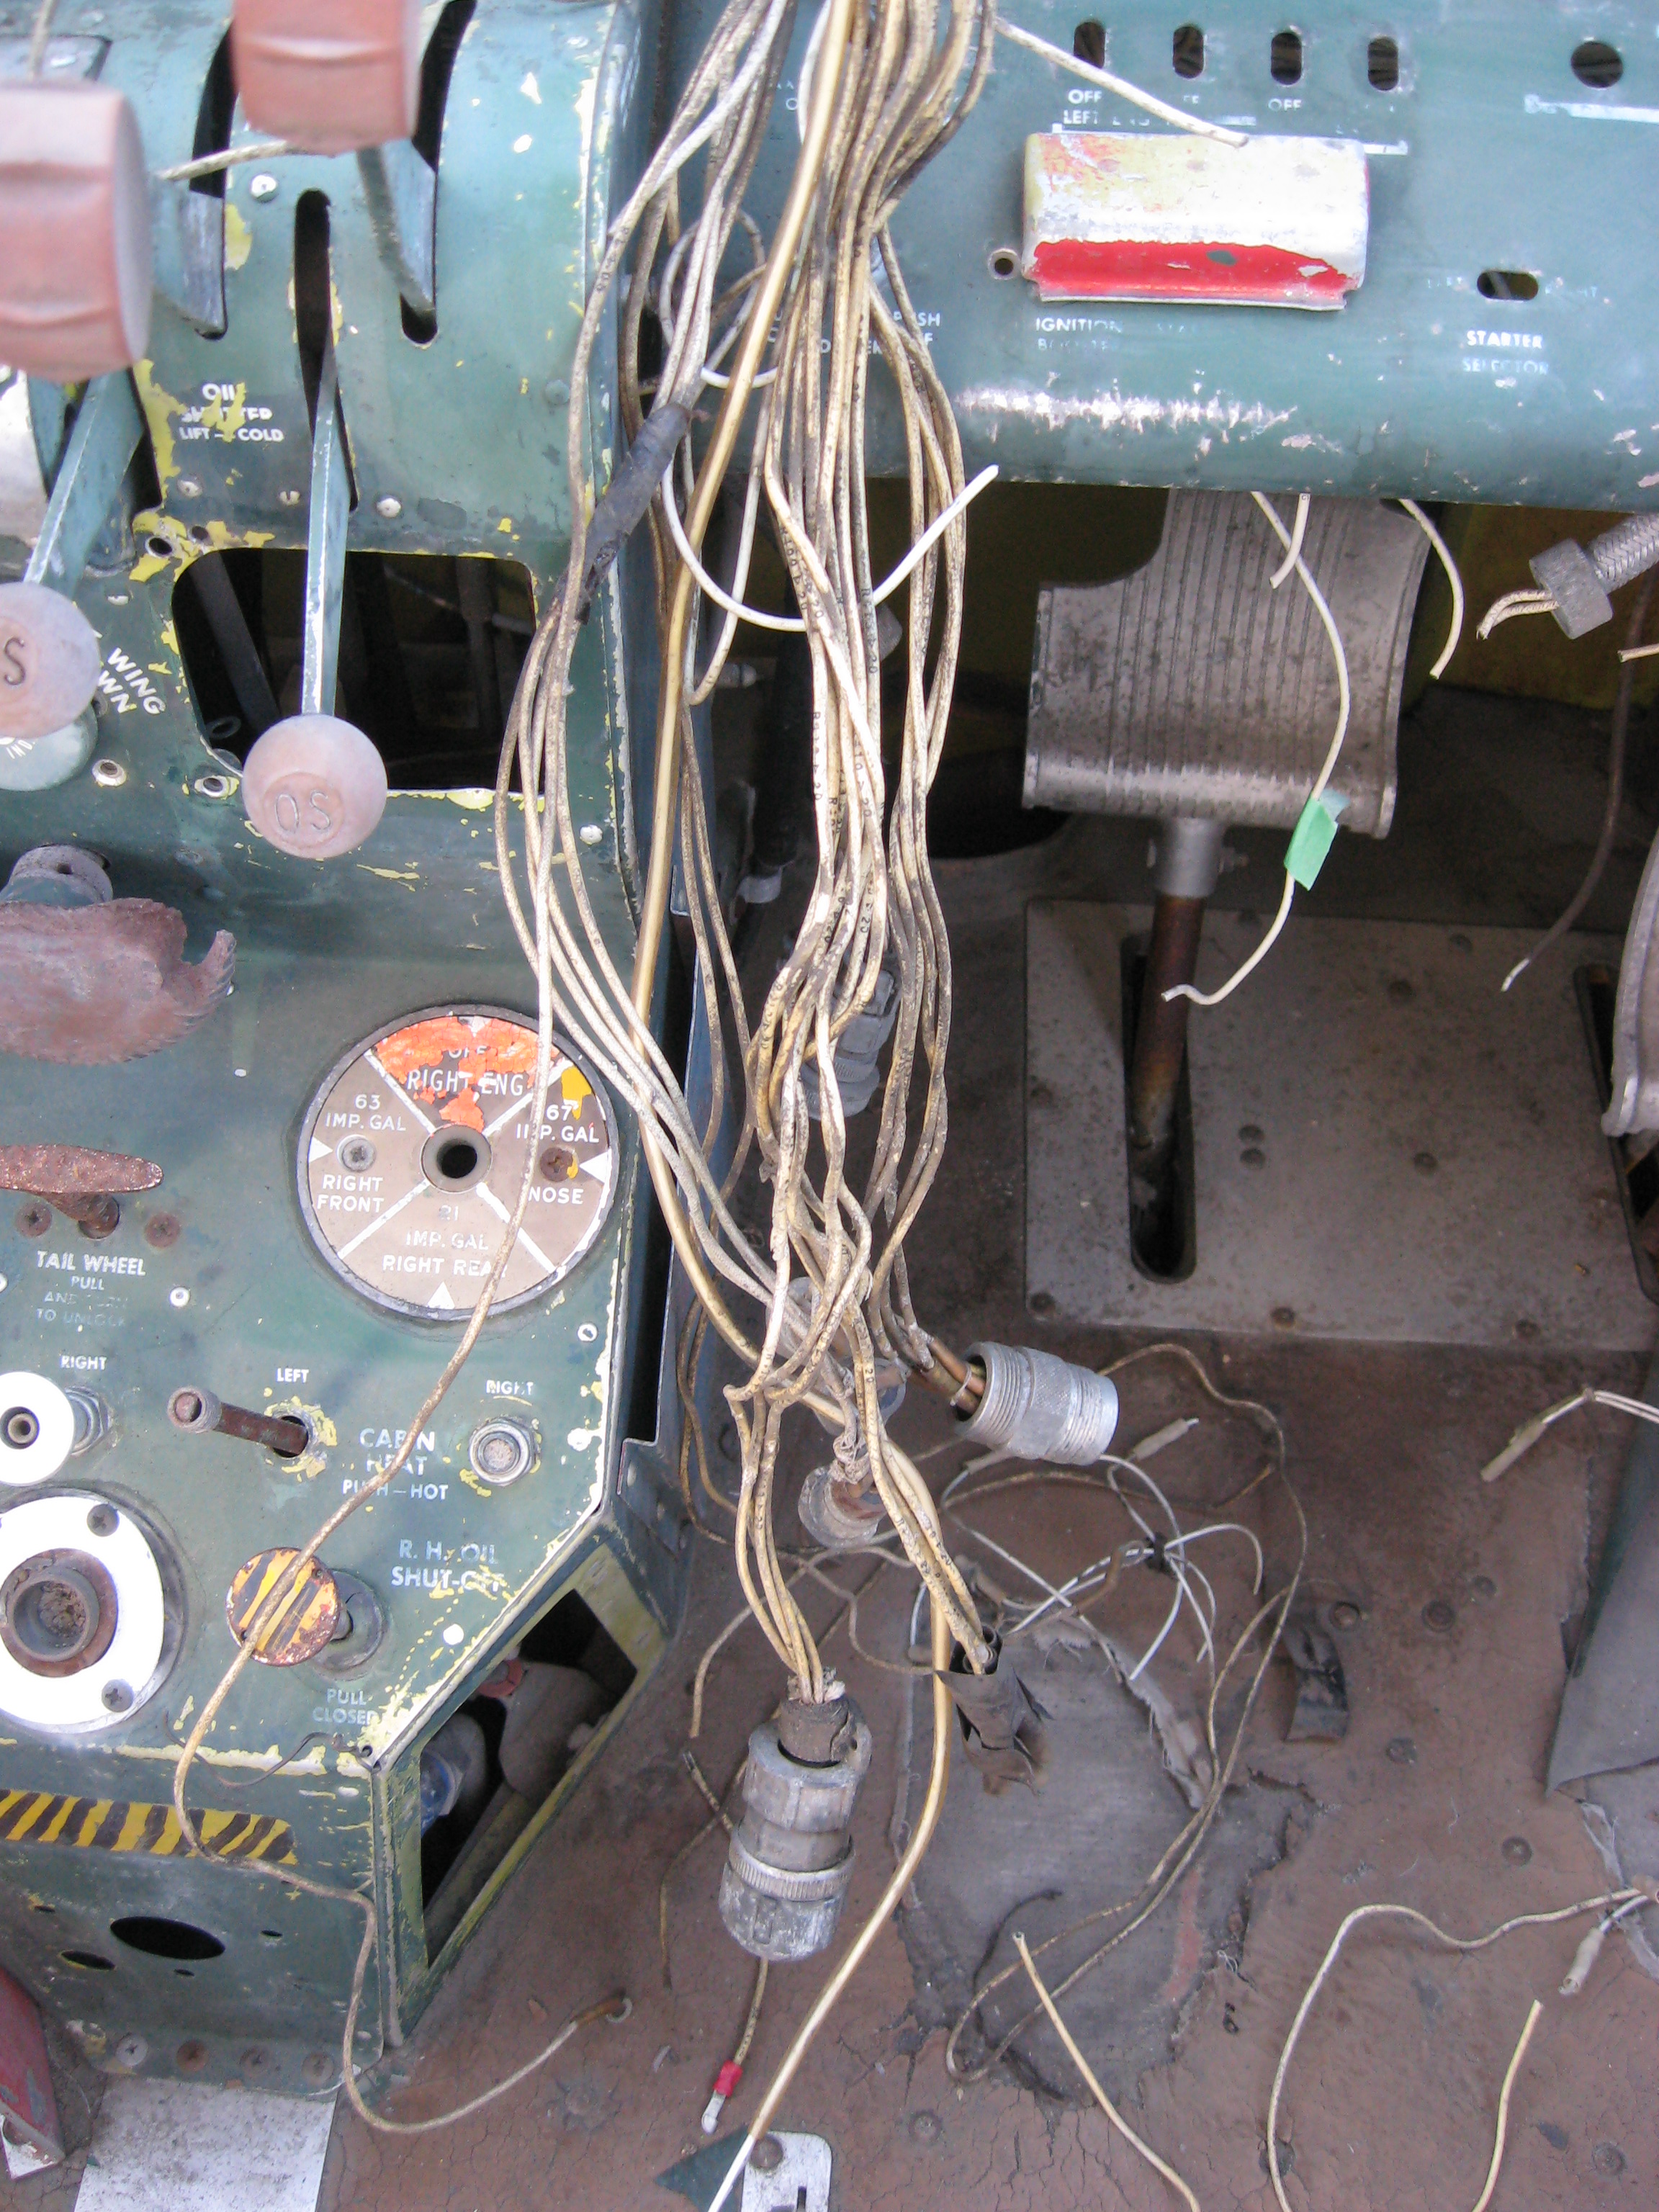
The other thing that should be pointed out is the fact that – until this MRP – there wasn’t any definitive electrical component map, or even the location and routing of the wire bundles. (So, one of the main things that was done was doing around and taking note of exactly what is where, and what shape it’s in.) And, one of the ways that I used to keep track of which wire was written down was a small piece of green tape was applied to it.
Making sure that the correct wire code and gauge was written down and plotted in the proper location was essential to this tasking. (Because it’s not enough to just plot the wire code and gauge once.) When that particular wire code and gauge was found, then it had to be noted where it was going – and in many cases traced to the approximate location. (And then verified.)

Starting to sort out the mess.

Clearly lots of work to do here.
As this is going to be – clearly – a large and ongoing problem, more on this tasking will follow. (But, the key take-aways are that a great deal of work has been started – followed with a great deal of comprehension – and more work clearly has to continue.)

At long last – progress is being made. The identified wires have been separated from the unidentified wires – and have been labelled accordingly.
Debris, dirt and general cleanliness may seem a bit trivial – considering the scope of this problem. (But, cleaning up the cockpit area was clearly needed – and I make a practise of both having as clean a work area as possible and as being as professional as I know how with regards to maintenance and taskings.)

Honestly, room for improvement – but it is nice to see progress on such an area that clearly needs a lot of work.
Making Stencils
Using a tape measure, tracing paper, and some rubbing alcohol (to clean the surface of all the accumulated debris), serious progress was made on this tasking. (One of the things that concerned me greatly was the fact that we’re dealing with trying to trace faded paint – worse, trying to see faded paint - through tracing paper.)
Surprisingly, it was quite easy to see the labelling – which, in the long run, will make the successful completion of this tasking possible. (The issue here is that – since this is a major overhaul of the airplane – I would like everything repainted.)
Especially the Pilot’s and Co-Pilot’s Subpanels!
Painting of Port Main Landing Gear Wheel Hub
Honesty and integrity has always been something that I’ve tried very hard to maintain with a great many things – especially maintenance. In this particular case, the Port Main Landing Gear Hub. With damage like that, clearly the inner hub can’t be used any more for anything related to flight. But, being completely honest – the Wheel Hub’s are a matched set. (So, if one hub gets broken or otherwise becomes U/S, then the whole Hub is U/S.)
Port Main Landing Gear Hub Painted.
Otherwise, you’d have mis-matched Hubs – which, in the long run, is a sure recipe for problems.
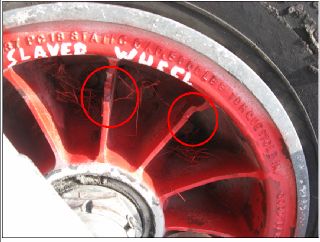
Close up of damage to Hub.
That’s why I made a point of painting the Hub red with the white lettering of “Slaved Wheel”. Perhaps I could have gotten away with mixing and matching hubs, but in the end your word and your honour are your gifts to yourself.
Pre Fit Cabin Door and Emergency Exit Hatch
“Make it fit” or “It’s good enough” may very well be common phrases, and they may even be used in relation to aircraft maintenance – just not on my airplane. That’s why I wanted to make the time on this MRP (even though the parts aren’t ready or certified to be installed) to make exceptionally careful measurements of where the parts will be fitted.
After all, one of the problems here is age. Not just the age of the airframe, but the age of the parts. (Meaning if something doesn’t fit exactly, I don’t want to force it into place.) Granted, forcing the part into place may make it work – at least initially. The real problems will come, though, after long use of the part. Worse – one of the parts (the Emergency Exit Hatch) is one that is hoped to never be use at all.
Initial measurements looked good with regards to the successful installation of the parts, which is a relief. (Granted, the parts still have to be overhauled.) But that means that now there are clearly established arcs with regards to what can fit and what can’t – and also how many shims are needed to make sure that everything fits properly. (This will also cut down on the wear and tear - and may either prevent breakage or the premature wear of hard to find parts.)
Securing of Aircraft
Luckily I was able to clear a path down to the ground – after a good deal of digging! – and, as a result the airplane is now firmly secured to the ground. Granted, the airplane hasn’t moved for a while. But – prior to this – all that she had holding her to the ground (in case of bad weather or strong winds) were old landing gear chocks and wishful thinking.

Port Landing Gear secured to the ground.
Potentially, bad weather may still cause problems – but at least the effort is being made to reduce the possibility of further damage to the airframe.

Starboard Landing Gear secured to the ground.
Rivet Count for Bulkhead 13
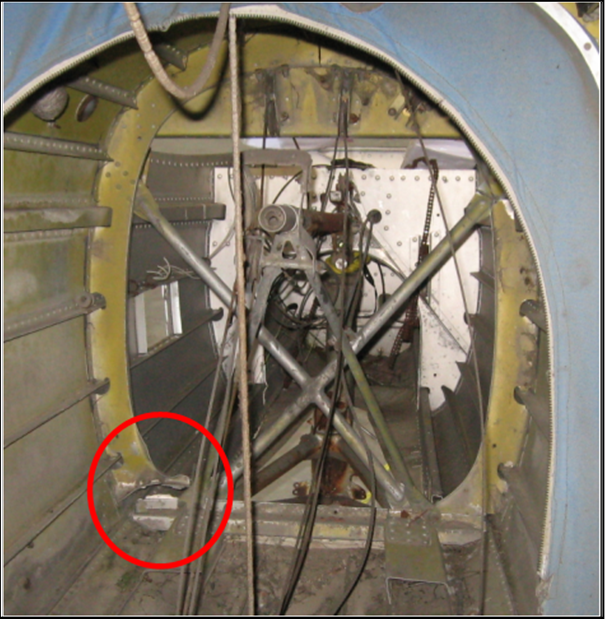
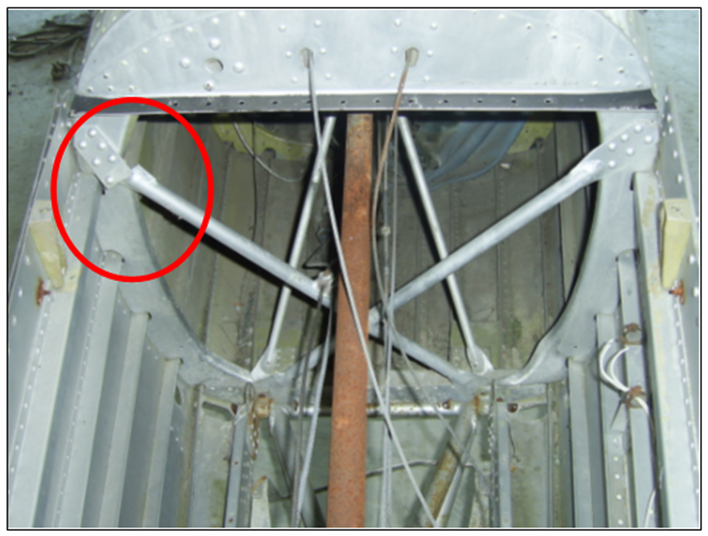
Recently – specifically during the planning stages for MRP 2013 – the issue of the previous damage that the airframe had taken before she was purchased was brought to my attention. (What is being specifically referred to is the fact that Bulkhead 13 is broken.) Not long after purchasing the airframe, Pat Alber and I went out on MRP 2008. (At that time it was discovered that Bulkhead 13 was broken.) Now, this isn’t damage related to storage and/or vandalism - this was damage that was caused when the airplane was flying
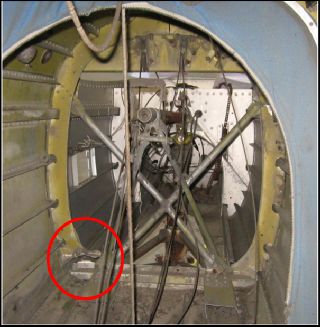
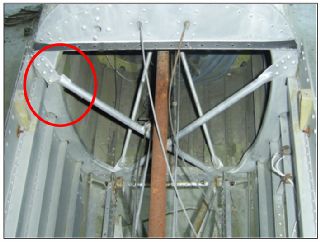
Photo Credit: Pat Alber
One of the interesting problems with the B18 is that if you bring the tail down too hard on landing, there is a very good chance that you’re going to do significant damage to the vertical stabilizers. As a matter of fact, if you hit too hard – or too often, or both – the force will also be transferred to Bulkhead 13. (With the expected result.)
Unless this damaged bulkhead is repaired – or, honestly, replaced – this damage would prohibit the safe return of the airframe to Serviceable Status. However, since MRP 2008 and the discovery of the damage, a replacement Bulkhead has been found.
Depending on the amount of space we’ve got to work with regards to getting bucking bars in place – not only that, just how many rivets we’re talking about drilling out perfectly (meaning no chance of enlarging the rivet hole) – we’re potentially talking about a great deal of work to change out that bulkhead.
Obscure tasking that it may be – granted, not as important as spending more time on the cockpit – it’s still a tasking that required a recce. (So, that’s what was done – and now I’ve got a pretty good idea as to how much space we’ve got to work with and how many rivets we’ve got to drill out – and put back in – safely and professionally.)
After Action Report
For now – at least, for this MRP – that’s it. The taskings that were assigned for this MRP were completed successfully - at least, the ones that could be completed with regards to weather! (Specifically, I would have preferred to have drilled off the damaged floor panel aft of Bulkhead 10 – but clearly the airplane was buried in a lot of snow.) It would be nice to say that after the completion of this MRP I went out and had a party, but I was already doing the prep work and research for the next MRP – complete with my mug of tea that wasn’t that far away.

Until next time!